
I just finished making this awesome ring for my daughter Erica, who had asked me to make her a Boho style amethyst crystal point ring.
I snapped a few photos during the process, so I thought I'd share them here with you. This is not a complete, standard step-by-step tutorial, but just a simple glimpse into the process that will maybe offer you some creative inspiration!
Soldering level: Beginner to Intermediate
Materials & tools needed:
- 1 large crystal point or other similar rough-cut stone bead with a center-drilled hole
- Silver or copper wire (whatever gauge fits through the hole in your bead, 20 gauge or 18 gauge)
- Ring mandrel or circular object the size of your finger to form the ring around
- Nylon jaw pliers for straightening the wire
- Wire cutters
- Soldering tools (silver lead-free jewelry solder, flux, soldering iron, etc. - if you are unfamiliar with soldering or need to know what materials or exact tools to use, see my book Boho Chic Jewelry for my complete recommended soldering set up and tools list!)

Choose a crystal or rough cut gemstone rock with a center-drilled hole. You can also use any type of large stone bead for this project.
First you will need to form your wire in the shape of a circle to create the shank of the ring. Use your nylon jaw pliers to straighten a length of copper or silver wire - I used about 12 to 14 inches of copper wire for this ring. Straighten the wire while it is on the spool and then cut the wire with your wire cutters.
Shape the shank of the ring (form the circle): Hold one end of the wire against your ring mandrel at the desired ring size marking on the mandrel and use your other hand to wrap the wire snugly around the mandrel two times. If you do not have a ring mandrel you can use any circular shaped object that is the size of your finger (maybe a lipstick tube or other similar sized object). Then carefully remove the wire from the mandrel.
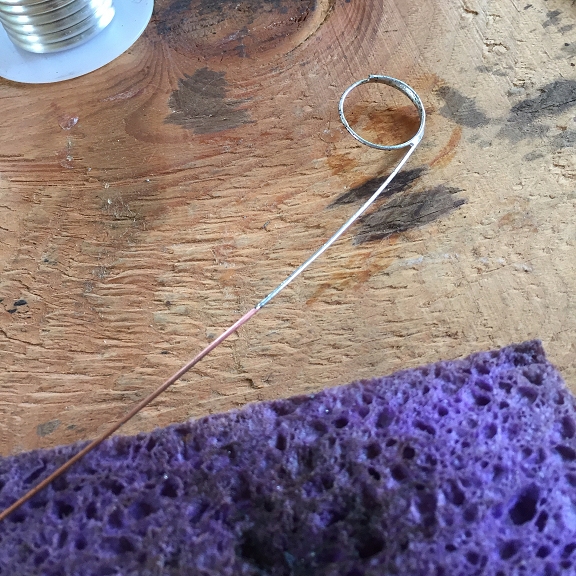
Hold the wire circles that you just formed in place with your soldering pliers and use your other hand to solder the wire rings together with a small amount of solder, coating the wires on all sides and binding them to each other with solder.

Next, thread your bead onto the long tail end of your wire and push the bead down the wire until it is flush against your ring's shank.
Bring the tail end of wire that traveled through the bead down toward the ring's shank and hold it against the ring's shank. Use a drop of solder to attach the tail of wire to the ring's shank as shown in the photo above.

Your ring should now look something like this.
Now slide the ring back onto the mandrel and carefully wrap the long tail end of wire around the mandrel again until all of the wire is used up. If you have excess wire you can snip the remaining wire off with your wire cutters. Tuck the pointy end of wire into the other wire wraps (try to hide the end).
Remove the ring from the mandrel and now solder the rest of the wires together, adding more solder as needed, until all of the wires are completely soldered together and your ring is formed (photo below).

If desired, add a few small droplets of decorative solder to the ring as I did in the photo above.
Once you are finished, make sure there are no pointy ends of wire anywhere on your ring. If there are, cover them up with a small drop of solder.
Wash, dry, polish, and enjoy your ring!
I hope you enjoyed this mini-tutorial! Check out my books Boho Chic Jewelry and Soldered Alchemy for tons of fun jewelry soldering projects, all kinds of soldering information, beautiful jewelry and soldering inspiration!
I hope you have a great week!
Love,
Laura

My broken china jewelry is always available for purchase at https://www.etsy.com/shop/dishfunctionldesigns

Jewelry design, article and images ©Laura Beth Love 2016 all rights reserved.
Project for personal use only. Commercial use forbidden under law without the express written permission of the copyright holder.
Project for personal use only. Commercial use forbidden under law without the express written permission of the copyright holder.


Tidak ada komentar:
Posting Komentar